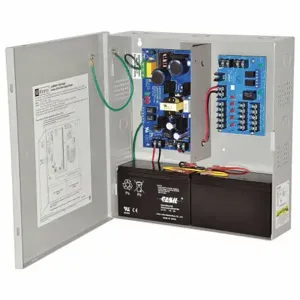
Altronix AL400ULM power supply is ideal for providing regulated and uninterrupted power to security and access control systems, such as access control systems, surveillance cameras and alarm systems. It is used in commercial, industrial and institutional settings, including office buildings, educational institutions and healthcare facilities.
Features:
- It features visual indicators, including AC input and DC output LED indicators on the power supply board, providing real-time feedback on the operational status of the power supply.
- This power supply comes with the capability for its outputs to operate in both fail-safe and fail-secure modes, offering flexibility in configuring access control systems to meet specific security needs.
- It incorporates a built-in charger designed for sealed lead acid or gel-type batteries, ensuring the efficient and reliable operation of battery backup systems in case of AC power failure.
- This power supply offers an automatic switch-over function to standby batteries when AC power fails, providing seamless power continuity to critical security and access control devices.
- It maintains a relative humidity level of 85% +/- 5%, contributing to stable and consistent performance in diverse settings.
Frequently Asked Questions:
Q. What is the storage temperature of Altronix AL400ULM power supply?
A. It has storage temperature range of -20 to 70 degrees C, respectively.
Q. What is the heating capacity of this Altronix power supply?
A. The power supply produces approximately 25 BTUh when operating at 12VDC and 37 BTUh when operating at 24VDC.
Q. How to install Altronix AL400ULM power controller?
A.
- Begin by marking and predrilling holes in the wall, aligning them with the top two keyholes on the enclosure.
- Securely install two upper fasteners and screws into the wall, ensuring that the screw heads protrude.
- Position the enclosure's upper keyholes over the two upper screws, making sure it's level, and then secure it in place.
- Mark the location for the lower two holes.
- After marking, remove the enclosure and proceed to drill the lower holes.
- Install three fasteners into the newly drilled holes.
- Place the enclosure's upper keyholes over the two upper screws once more.
- Finally, install the two lower screws and be sure to tighten all screws securely.


