These cookies make our website work. They include logging personal details, like login/sign-up or account data, browser information, images & videos, and shopping cart journey.
In addition, we use optimization cookies to test new features and designs on our website. The information collected helps us improve our website and customers' experience.
These cookies are used to understand the performance and relevancy of our adverts, to provide you with personalised adverts on other websites and social media, to track when you have arrived at our site from a recognised third-party affiliate website, and to track if you made a purchase based on the adverts we displayed to you.
These cookies enable us to provide personalised product and content recommendations, to make the browsing experience more relevant to you.
These cookies are used to offer customer surveys and feedback, to improve search results, and to allow you to share content from our website on social media.
These cookies help us improve our website by collecting and reporting information on how you use it.
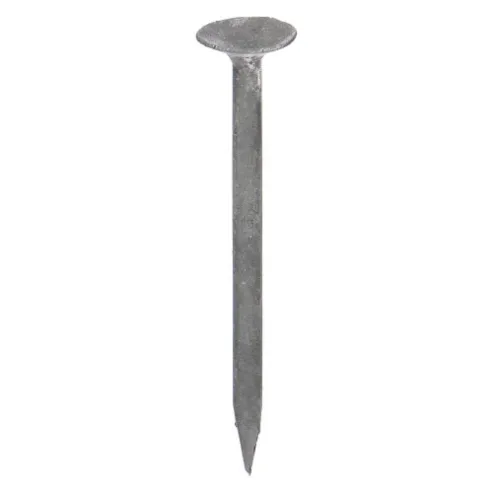
Drywall Nails
<p>Drywall nails are used for the installation of drywall and plasterboards. These nails feature a cupped head that disappears into the sheetrock for a smooth finish, excellent corrosion resistance and lubrication.</p>
Drywall Nails
Drywall nails are used for the installation of drywall and plasterboards. These nails feature a cupped head that disappears into the sheetrock for a smooth finish, excellent corrosion resistance and lubrication.
Features
- Drywall nails come with a ringed or barbed shank that provides superior holding power.
Frequently Asked Questions
What are the advantages of drywall nails?
- These nails work well under pressure, making them suitable for challenging jobs requiring more weight.
- They are more affordable than screws.
- Drywall nails are much less likely to break than screws while experiencing shear force.
- They are quicker to install than screws.
How to fix nail pops in drywall?
- Wear safety glasses and use a hammer to drive the protruding nail back into the wall.
- Secure the drywall to wooden studs with two drywall screws. Position one screw directly above the nail and one screw directly below the nail.
- Use a drywall taping knife to apply a light layer of joint compound over the holes.
- Permit the joint compound to dry for 2 to 4 hours. Turn On a fan to speed up the drying process.
- Add a second coat of joint compound. If the patch is not blending well with the surrounding wall, use a broad feathering knife to draw a wide & thin coat farther out on the wall.
- After inspecting the area and checking for the joint compound shrinkage (while drying), apply a third coat. Sand the area lightly using fine-grit sandpaper. Paint the surface after applying primer to the repair area.
We are here to help!
Looking for a part not listed here?
Popular Search Queries
Explore More
- ENCORE
- E-Z LOK
- DUAL ELECTRONICS
- KEYSHAFT
- Brake Line Accessories
- Duct and Cloth Tapes
- Hardware Cloth
- Rolling Ladder Accessories
- Forklift Limiter Fuses
- ALTRONIX Magnetic Cable Tie Mounts Wire Management for Altronix Systems
- WINTERS Dial Pressure Gauges with Color Coded Cases
- REGAL Pipe Thread Gages, 6 Step, NPTF, Bright
- ADB HOIST RINGS MFG. Safety Engineered Hoist Rings, Stainless Steel
- VALLEY CRAFT Panel Packs for Heavy Duty Shelving
- OIL SAFE Bulk System QC Upgrade Kits
- IRONCLAD Summit Reflective Gloves
- OIL SAFE Colour Coded Quick Connects, Male
- ADB HOIST RINGS MFG. EN Guard Hoist Rings, Metric
- WHIZARD SKC Cut Resistant Sleeves

